Glbインポート
glb ファイルを Unity の Assets 下のフォルダに投入すると、glb を Asset 化できます。
ReverseAxis 反転軸の設定 v0.68.0
glTFの右手系Y-UP から Unityの左手系Y-UP に変換するときに反転する軸を選択できます。
- Z軸 (v0.68.0 より前と同じ)
- X軸 (v0.68.0 から追加)
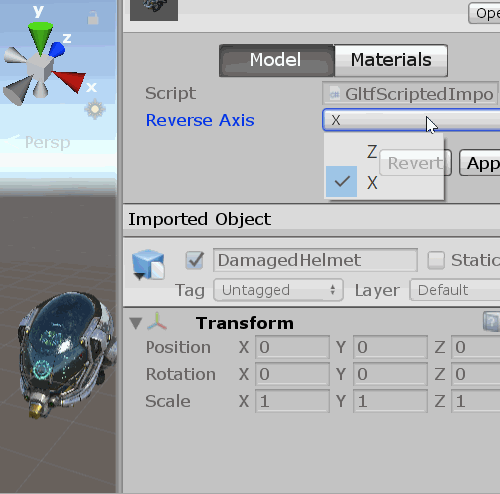
選択して Apply を押すと反映されます。
glb の extract
https://github.com/KhronosGroup/glTF-Sample-Models/tree/master/2.0/DamagedHelmet/glTF-Binary
を例に説明します。
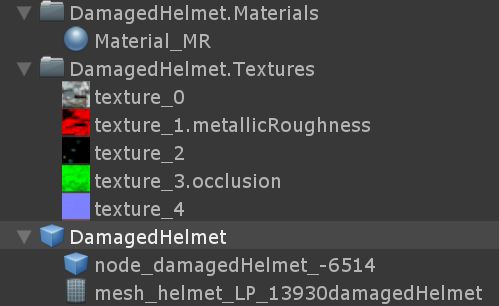
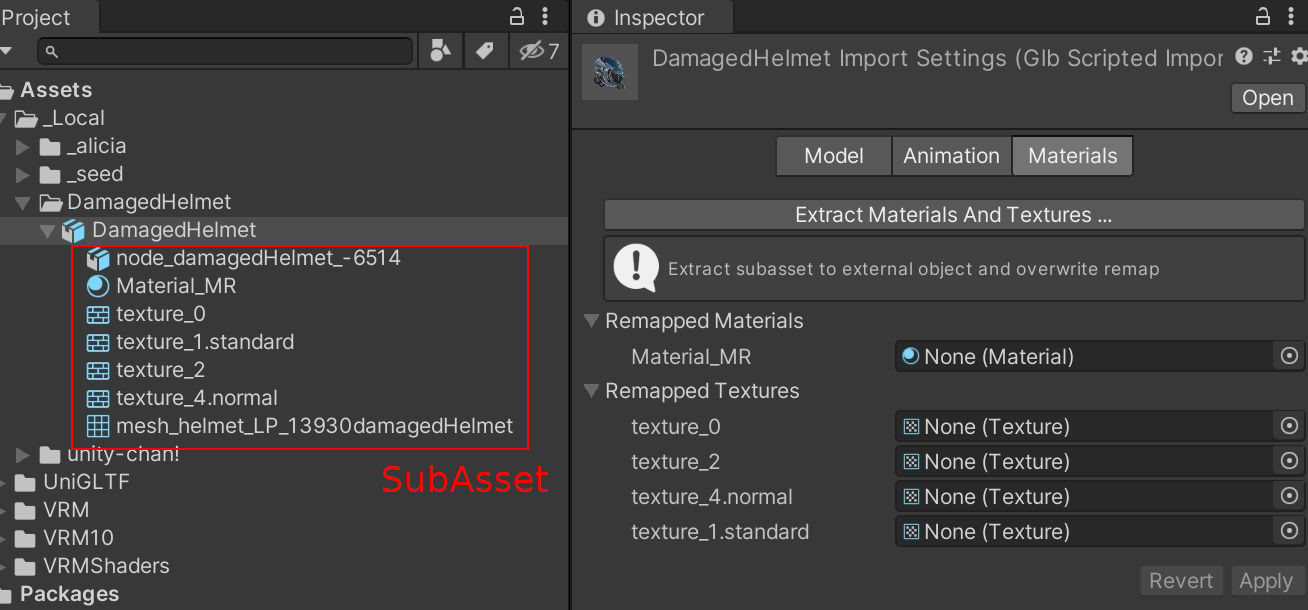
clear
初期状態(clear)では、glb に含まれる Asset (Mesh, Material, Texture, AnimationClip) は SubAsset として glb(DamagedHelmet) の配下になります。 配下のアセットは変更することはできずに ReadOnly です。

extract
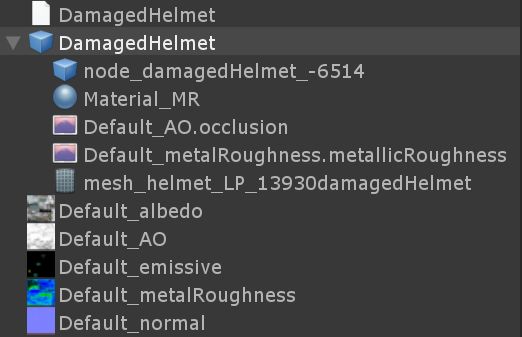
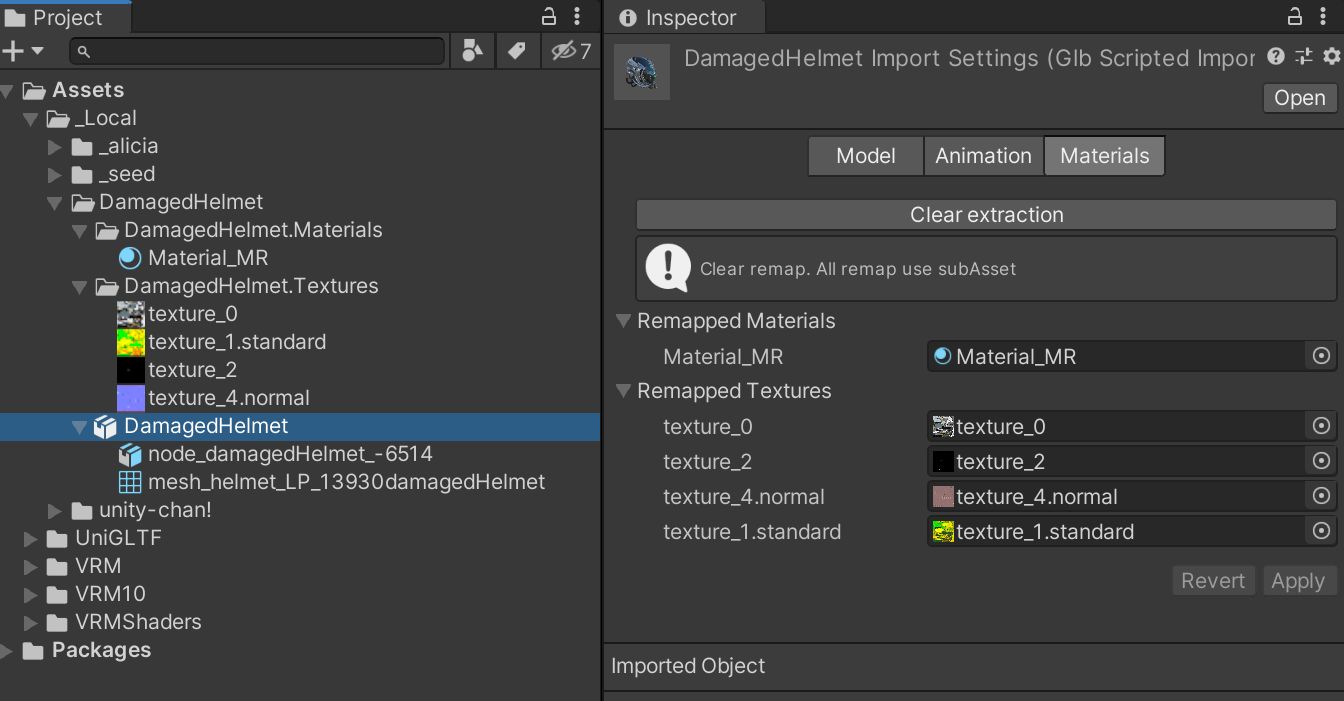
Extract Materials and Textures ... を押すと下記のように変化します。
glb(DamagedHelmet) の配下から取り出されて(extract) 独立した Asset ��になります。
取り出されたアセットは変更可能になります。
gltf の extract
https://github.com/KhronosGroup/glTF-Sample-Models/tree/master/2.0/DamagedHelmet/glTF
を例に説明します。
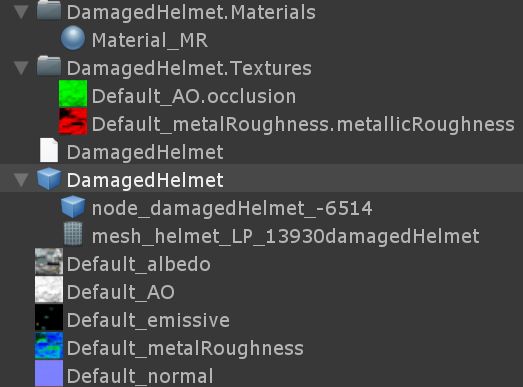
clear
初期状態(clear)では、関連する Asset (Mesh, Material, Texture(変換が必要なもの), AnimationClip)は SubAsset として配下になります。 配下のアセットは変更することはできずに ReadOnly です。
:class: warning
glTF では元々テクスチャーなどは独立したファイルですが、 変換が必要な場合は使われないことに注意してください。 上記の例では、Default_metalRoughness, Default_AO は変換対象です。
extract
Extract Materials and Textures ... を押すと下記のように変化します。
glb(DamagedHelmet) の配下から取り出されて(extract) 独立した Asset になります。
取り出されたアセットは変更可能になります。
AssetFile の作られ方
VRM0 とv0.67以前のGLB/GLTF の Importer
以下のように import されます。
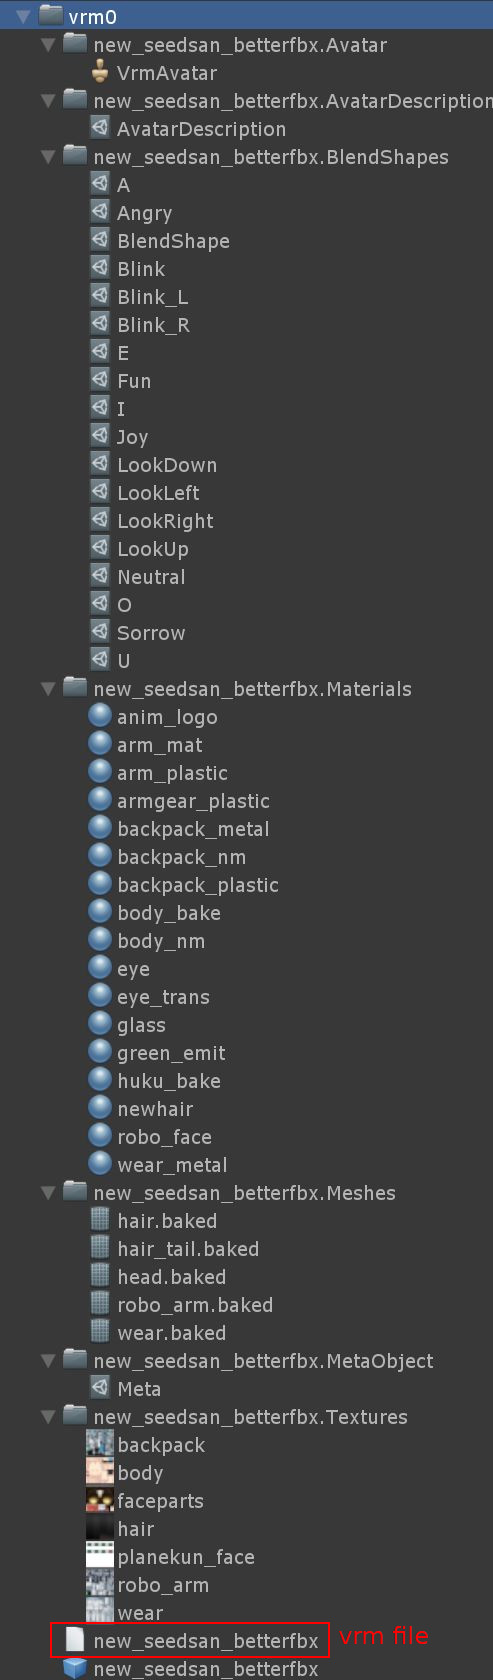
- mesh や texture や material や blendshape などの
独立した関連アセットファイルが作成されます。
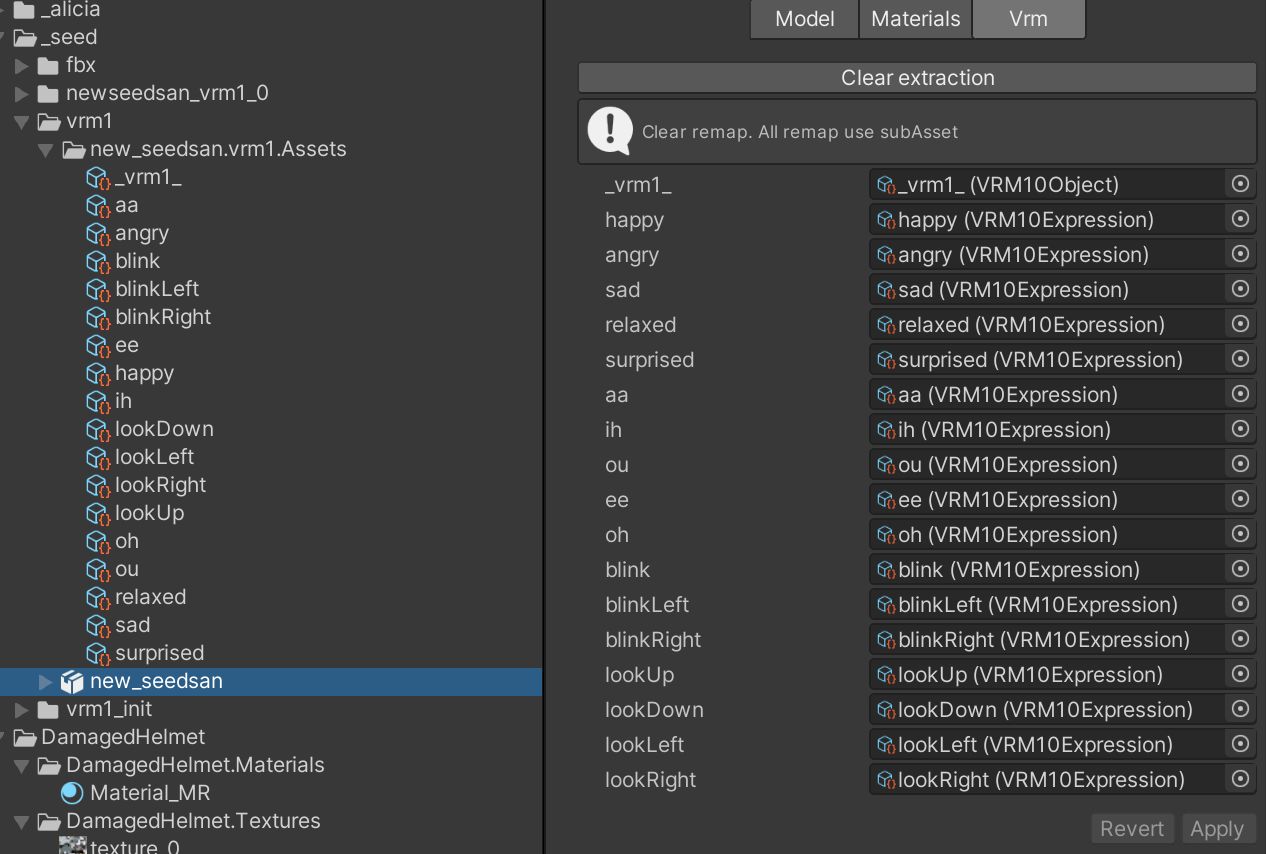
VRM1 とv0.68以降のGLB/GLTF の Importer
以下のように import されます。
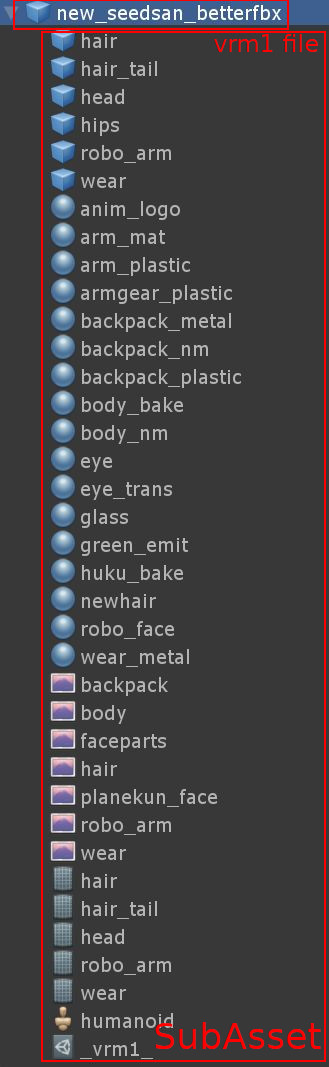
- mesh や material や texture や Expression が
SubAssetとして作成されます。
- material と texture が
SubAssetとして作成されます
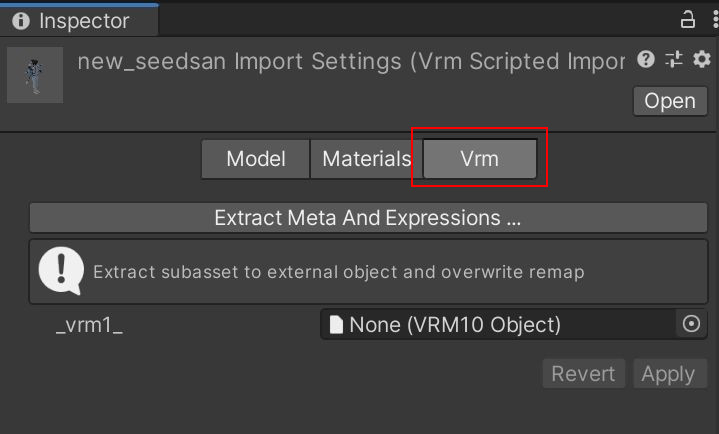
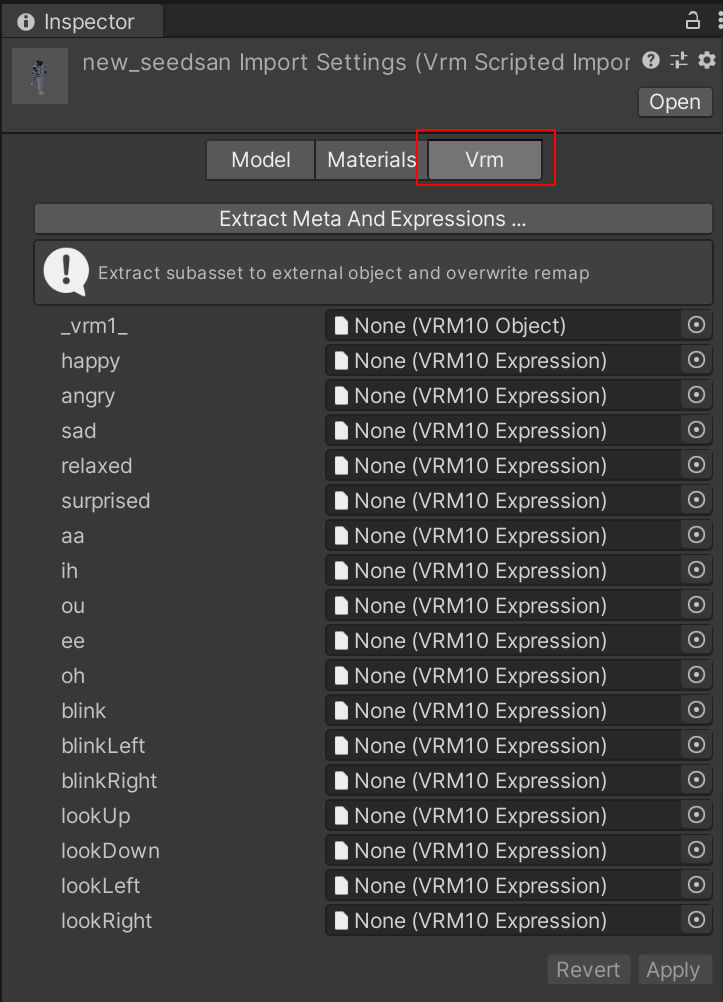
SubAsset を変更するには Extract する
新しい Importer で作られた SubAsset は 変更ができません。
SubAsset は glb や VRM 内のリソースを表しているためで、 例えば Material を変更しても、その変更を元の glb / VRM に反映することができません。
FBX の Importer も同様の動作です。
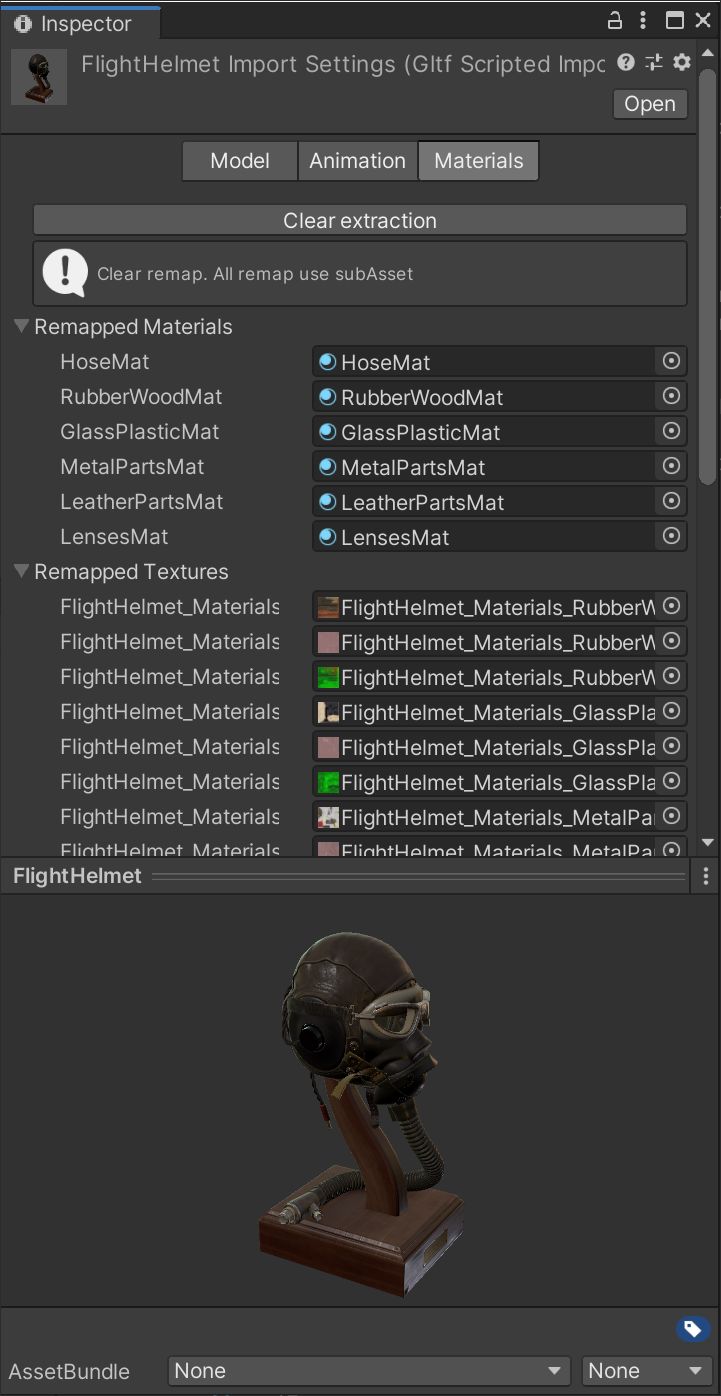
VRM1 とv0.68以降のGLB/GLTF では、Material タブなどで extract ができます。
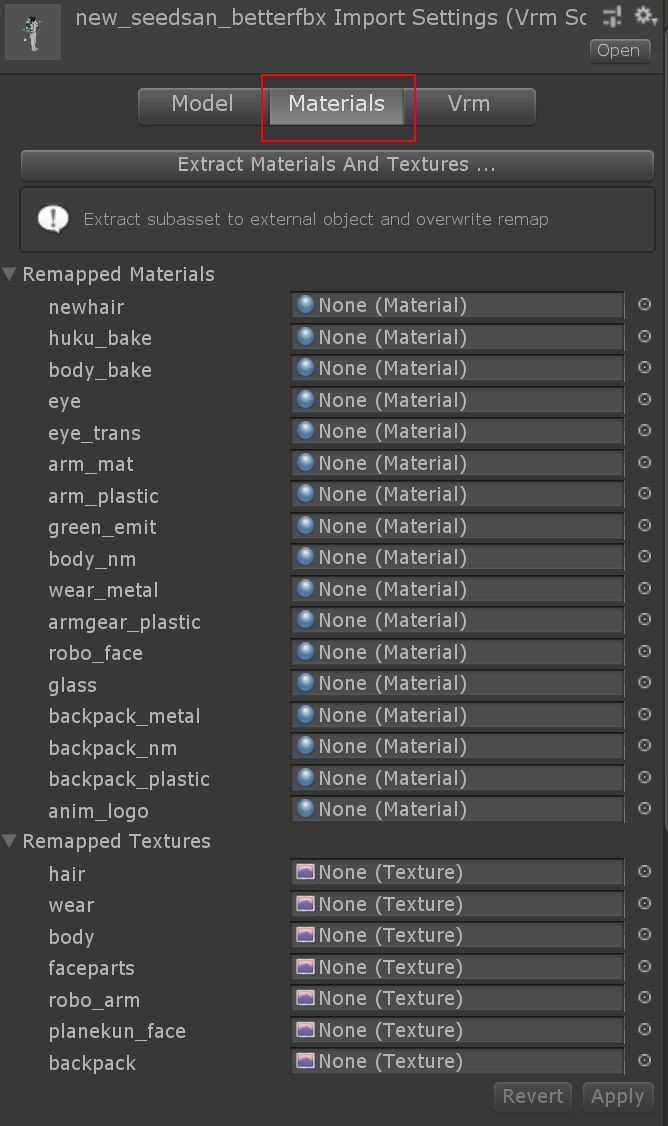
fbx importer の material タブには下記のようなボタンがあります。
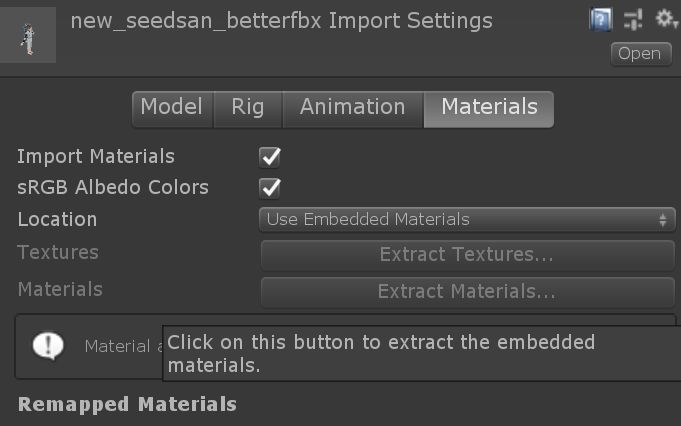
Export Textures... や Export Materials... すると fbx の中の material を 外にコピーして独立した Asset とすることができます。
このコピーされた Asset は自由に変更することができます。
外部の Asset と glb / VRM を関連付ける Remap
初期�状態では glb / vrm 内部の Asset が使用されますが、これを外部の Asset と置き換えることができます。 置き換えの関連付けを管理するのが Remap です。
- None になっているときは、
glb,vrm内部の SubAsset を使用しているという意味になります。 - 既存のAssetを割り当てることができます
SubAsset が書き出され、それが Remap に代入されます。